This blog provides an overview of deploying of Sitecore 9 to Azure App Service using Sitecore Azure Toolkit 2, ARM templates and PowerShell script. The functionality to provision Sitecore to App services existed since Sitecore 8, this release added support for more configuration topologies along with out of the box support for data security for xConnect components. Sitecore in App Service no longer required Mongo, Azure SQL is used for xConnect, CMS and session data. Complete deployment to Azure of XPSigngle instance takes in average 40 minutes to complete, please consider the cost of running multiple Azure components, mainly search. The complete XPSingle configuration, in its original forms, will cost an owner more than $200 a month. The cost can be reduced by tuning Databases configuration and size of Azure search.
Demo:
Prerequisites
- Provision Azure Account and obtain Subscription Id.
- Create Microsoft Storage account using this guide or just go to Azure Portal, click “+” -> Storage->Storage Account and select blob storage
- Choose the desired topology using this table. For demonstration purposes, XPSingle configuration was selected. Sitecore made available 6 topologies to choose from:
| Resource | Description |
|---|---|
| Packages for XP Single | Packages for XP Single (XP0) Instance configuration. |
| Packages for XP Scaled | Individual packages for each of the dedicated XP Scaled (XP1) roles. |
| Packages for XM Single | Packages for XM Single (XM0) Instance configuration. |
| Packages for XM Scaled | Individual packages for each of the dedicated XM Scaled (XM1) roles. |
| Packages for XDB Single | Packages for XDB Single (XDB0) Instance configuration. |
| Packages for XDB Scaled | Individual packages for each of the dedicated XDB Scaled (XDB1) roles |
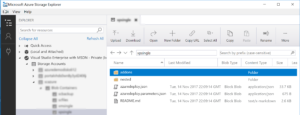
- Upload selected configuration to Azure blob storage.
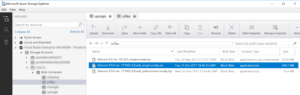
- Download latest Sitecore Azure Toolkit, at the time of this blog version 2.0 is available, and unzip it to your workplace location.
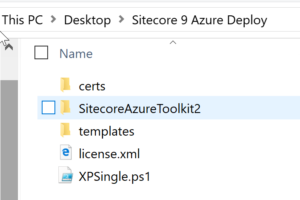
- Download latest ARM templates for selected topology, once downloaded, upload all to boob storage and place azuredeploy.parametrs.json to workplace location.
![]()
- Create and sign certificate file. The certificate will be used by installer script in a later step. Example script
$thumbprint = (New-SelfSignedCertificate `
    -Subject "CN=$env:COMPUTERNAME @ Sitecore, Inc." `
    -Type SSLServerAuthentication `
    -FriendlyName "$env:USERNAME Certificate").Thumbprint

$certificateFilePath = "C:\xxxxx\certs\$thumbprint.pfx"
Export-PfxCertificate `
    -cert cert:\LocalMachine\MY\$thumbprint `
    -FilePath "$certificateFilePath" `
    -Password (Read-Host -Prompt "Enter password that would protect the certificate" -AsSecureString)
- Update azuredeploy.parametrs.json file with relevant information.
- location – Azure datacenter location, for example, “East Us”
- sitecoreAdminPassword – password for Sitecore SQL Database
- singleMsDeployPackageUrl – location of a Sitecore Zip file, example: https://xxxx.blob.core.windows.net/xxxx/Sitecore%209.0.0%20rev.%20171002%20(Cloud)_single.scwdp.zip
- xcSingleMsDeployPackageUrl – same as above, but for xConnect.
- authCertificatePassword – secret used while creating certificate file
- allowInvalidClientCertificates – must be set true for self-signed certificates
{
  "$schema": "https://schema.management.azure.com/schemas/2015-01-01/deploymentParameters.json#",
  "contentVersion": "1.0.0.0",
  "parameters": {

    "location": {
      "value": "East US"
    },
    "sitecoreAdminPassword": {
      "value": "XXXXX"
    },

    "sqlServerLogin": {
      "value": "scaccnt"
    },
    "sqlServerPassword": {
      "value": "XXXXX"
    },
    "singleMsDeployPackageUrl": {
      "value": "https://xxxx.blob.core.windows.net/xxxx/Sitecore%209.0.0%20rev.%20171002%20(Cloud)_single.scwdp.zip"
    },
    "xcSingleMsDeployPackageUrl": {
      "value": "https://xxx.blob.core.windows.net/xxx/Sitecore%209.0.0%20rev.%20171002%20(Cloud)_xp0xconnect.scwdp.zip"
    },

    "authCertificatePassword":{
      "value": "xxxxx"
    },

	"allowInvalidClientCertificates": {
      "value": true
    }
  }
}
- Update installer script as required:
- DeploymentId – the name of the resource group and prefix to types within the resource group. Also, a prefix for App Service website.
- Certificate file – location of certificate created earlier
- SubscriptionId – subscription ID, created in step #1.
- Location – Location of Microsoft Datacenter
- ParamFile -location of parameter file, created in a previous step
- azureDeployFile – location of Azure ARM topology, uploaded to blob storage
$DeploymentId = "XXXXXXX"
$CertificateFile = “C:\xxxx\Sitecore 9 Azure Deploy\certs\xxxxxxxxxxxx.pfx”
$SubscriptionId = "XXXXXXXXXXXXXXXXXXXXXX"
$Location="East US"
$ParamFile=".\templates\azuredeploy.parameters.json"
$azureDeployFile="https://xxx.blob.core.windows.net/xxxx/azuredeploy.json"

$LicenseFile = ".\license.xml"

$Parameters = @{
    "deploymentId"=$DeploymentId;
    "authCertificateBlob" = [System.Convert]::ToBase64String([System.IO.File]::ReadAllBytes($CertificateFile))
}

#optional auth code to store login profile data for reuse.

       $myprofile = "C:\" + [Environment]::UserName + "_Profile.json"


        if(test-path $myprofile)
        {
            try
            {
                Import-AzureRmContext -Path $myprofile
                Select-AzureRmSubscription -SubscriptionId $SubscriptionId -ErrorAction Stop
            }
            catch
            {
                Login-AzureRmAccount
                Save-AzureRmContext -Path $myprofile -Force
            }
        }
        else
        {
            Login-AzureRmAccount
             Save-AzureRmContext -Path $myprofile -Force
        }


Import-Module ".\SitecoreAzureToolkit2\tools\Sitecore.Cloud.Cmdlets.psm1" -Verbose

Set-AzureRMContext -SubscriptionId $SubscriptionId

Start-SitecoreAzureDeployment -Name $DeploymentId  -Location $Location -ArmTemplatePath $azureDeployFile  -ArmParametersPath $ParamFile  -LicenseXmlPath $LicenseFile  -SetKeyValue $Parameters -Verbose
- Run script, grub coffee and patiently wait while resources are created….
Update: 2/24/2018
While installing Sitecore 9.0.1 I start getting this error:
AppGallery Deploy Failed: 'System.Net.WebException: The request was aborted: Could not create SSL/TLS secure channel.
or from the installation log:
 <entry time="2018-02-24T16:44:45.4806855Z" type="Message">

        <message>Downloading package path 'Sitecore/Sitecore-Azure-Quickstart-Templates/releases/download/v2.0.1/DisablePrefetchCache.scwdp.zip' from blob 'https://github.com'</message>

    </entry>

    <entry time="2018-02-24T16:45:09.5337696Z" type="Error">

        <message>Failed to download package.</message>

    </entry>

    <entry time="2018-02-24T16:45:09.5650185Z" type="Error">

        <message>AppGallery Deploy Failed: 'System.Net.WebException: The request was aborted: Could not create SSL/TLS secure channel.
It seems as AzureApp Service is not able to access github.com
Fix:
Upload DisablePrefetchCache.scwdp.zip to a Azure Blob and update disablePrefetchCachingMsDeployPackageUrl node with the URL for the file on the blob.
"disablePrefetchCachingMsDeployPackageUrl": {
"type": "securestring",
"minLength": 1,
"defaultValue": "https://scazure.blob.core.windows.net/scfiles/DisablePrefetchCache.scwdp.zip"
},


")
Recent Comments